
Home Improvement
how to clean white painted woodwork


White painted woodwork adds a clean, bright, and elegant look to any home. It is commonly found on doors, trim, baseboards, window frames, cabinets, and furniture. However, while white surfaces look beautiful, they also tend to show dirt, dust, stains, and fingerprints more easily than darker finishes. Over time, white painted woodwork can appear dull or yellowed if not properly maintained. Learning how to clean white painted woodwork correctly helps preserve its appearance and extend its lifespan.
Cleaning painted wood requires a gentle approach because harsh chemicals or abrasive tools can damage the paint. With the right methods and regular maintenance, it is possible to keep white painted surfaces looking fresh and new. This guide explains everything in detail, from basic cleaning techniques to handling stubborn stains and maintaining long-term cleanliness.
understanding white painted surfaces
Before starting the cleaning process, it is important to understand the nature of painted wood surfaces. White painted woodwork is usually coated with either water-based or oil-based paint. Each type of paint has different characteristics that affect how it should be cleaned.
Water-based paints are more common in modern homes. They dry quickly and are easier to clean with mild solutions. Oil-based paints, on the other hand, are more durable but can yellow over time, especially in areas with limited sunlight.
The finish of the paint also matters. Gloss and semi-gloss finishes are more resistant to stains and easier to clean, while matte finishes are more delicate and can be damaged by excessive scrubbing.
Knowing the type of paint and finish helps determine the safest and most effective cleaning method.
basic cleaning routine
Regular cleaning is the best way to keep white painted woodwork in good condition. Dust and light dirt can be removed easily with simple tools and minimal effort.
Start by dusting the surface using a soft cloth, microfiber cloth, or a duster. This removes loose particles that can scratch the paint if rubbed during cleaning.
After dusting, prepare a mild cleaning solution using warm water and a small amount of gentle dish soap. Dip a soft cloth into the solution, wring it out well, and wipe the surface gently.
Work in small sections and avoid soaking the wood, as excessive moisture can damage both the paint and the wood underneath. Once the surface has been cleaned, use a dry cloth to remove any remaining moisture.
This basic routine can be done regularly to maintain cleanliness and prevent buildup.
deep cleaning white woodwork
Over time, dirt and grime can accumulate on white painted surfaces, especially in high-traffic areas. Deep cleaning may be required to restore brightness and remove stubborn buildup.
To deep clean, start with the same mild cleaning solution used for regular cleaning. For areas with heavier dirt, slightly increase the concentration of soap, but avoid using strong chemicals.
Use a soft sponge or cloth to gently scrub the surface. Pay attention to corners, edges, and grooves where dirt tends to accumulate. For intricate details, a soft toothbrush can be used to reach tight spaces.
After cleaning, rinse the area with a damp cloth to remove any soap residue. Finish by drying the surface thoroughly.
Deep cleaning should be done occasionally, depending on the level of use and exposure to dirt.
removing stains and marks
White painted woodwork is prone to visible stains such as fingerprints, scuff marks, and grease. Removing these marks requires a careful approach to avoid damaging the paint.
For light stains, a damp cloth with mild soap is usually sufficient. Gently rub the affected area until the stain is removed.
For tougher marks, a mixture of baking soda and water can be used to create a mild paste. Apply the paste to the stain and gently rub with a soft cloth. Baking soda acts as a gentle abrasive that helps lift stains without scratching the surface.
Magic eraser-type cleaning pads can also be effective, but they should be used cautiously. These pads are slightly abrasive and may dull the finish if used too aggressively.
Always test any cleaning method on a small, hidden area before applying it to visible surfaces.
dealing with grease and kitchen buildup
Woodwork in kitchens is often exposed to grease and cooking residue, which can create a sticky layer over time. Cleaning this buildup requires slightly stronger methods.
A solution of warm water and a small amount of dish soap designed to cut grease can be effective. Apply the solution with a cloth and gently wipe the surface.
For stubborn grease, a mixture of vinegar and water can help break down residue. Use this solution sparingly and rinse with clean water afterward to prevent any lingering odor.
Avoid using harsh degreasers or strong chemicals, as they can damage the paint and leave streaks.
cleaning mold and mildew
In areas with high humidity, such as bathrooms, white painted woodwork may develop mold or mildew. This not only affects appearance but can also pose health concerns.
To clean mold, use a solution of water and a small amount of vinegar or a mild cleaning agent. Apply the solution to the affected area and gently scrub with a soft brush or cloth.
Ensure proper ventilation during cleaning and allow the surface to dry completely afterward. Keeping the area dry and well-ventilated helps prevent mold from returning.
For severe mold problems, stronger cleaning solutions may be required, but they should be used carefully to avoid damaging the paint.
preventing yellowing
One common issue with white painted woodwork is yellowing over time. This can be caused by factors such as aging paint, lack of sunlight, or exposure to smoke and pollutants.
Regular cleaning helps reduce yellowing by removing dirt and residue that can discolor the surface. Allowing natural light into the room can also help maintain brightness.
If yellowing becomes significant, repainting may be necessary to restore the original appearance. Choosing high-quality paint with resistance to yellowing can help prevent future issues.
maintaining long term cleanliness
Maintaining white painted woodwork requires consistent care and attention. Establishing a regular cleaning schedule helps prevent dirt buildup and keeps surfaces looking fresh.
Wiping down frequently touched areas such as door frames and baseboards on a weekly basis can make a noticeable difference. Monthly deep cleaning can help address areas that accumulate more dirt.
Using protective measures such as door mats and proper ventilation can also reduce the amount of dirt and moisture that reaches wood surfaces.
Consistency is key to maintaining the appearance and durability of painted woodwork.
tools and materials to use
Using the right tools and materials is essential for effective cleaning. Soft microfiber cloths are ideal because they trap dust and dirt without scratching the surface.
Sponges with a non-abrasive surface are also useful for cleaning without damaging the paint. Soft brushes or old toothbrushes can help clean detailed areas.
Mild cleaning solutions such as diluted dish soap are generally safe for most painted surfaces. Avoid using steel wool, harsh scrubbers, or strong chemical cleaners, as they can damage the finish.
Choosing gentle tools ensures that the paint remains intact while achieving a thorough clean.
common mistakes to avoid
There are several common mistakes that can damage white painted woodwork. One of the most frequent errors is using too much water. Excess moisture can seep into the wood and cause swelling or peeling.
Using harsh chemicals is another mistake. Strong cleaners can strip paint, leave discoloration, or create dull patches on the surface.
Scrubbing too hard can also damage the finish, especially on matte or older paint. Gentle cleaning is always more effective and safer.
Ignoring regular maintenance can lead to heavy buildup, making cleaning more difficult over time.
Avoiding these mistakes helps preserve the quality and appearance of the woodwork.
restoring heavily soiled woodwork
In some cases, white painted woodwork may become heavily soiled or damaged. When regular cleaning is not enough, more intensive restoration may be required.
Start by thoroughly cleaning the surface using appropriate methods. If stains or discoloration remain, light sanding may be necessary to remove the top layer of paint.
After sanding, the surface can be repainted to restore its original appearance. Choosing high-quality paint and applying it properly ensures a long-lasting finish.
Restoration should be done carefully to avoid damaging the wood and to achieve a professional result.
conclusion
Cleaning white painted woodwork is an important part of maintaining a clean and attractive home. While white surfaces may show dirt more easily, they can be kept looking bright and fresh with regular care and proper cleaning techniques.
By understanding the type of paint, using gentle cleaning solutions, and avoiding harsh methods, it is possible to remove dirt, stains, and buildup without damaging the surface. Regular maintenance, combined with occasional deep cleaning, helps preserve the beauty and durability of painted woodwork.
With consistent effort and the right approach, white painted wood surfaces can remain clean, vibrant, and visually appealing for many years.

Toilet bombs, also known as toilet fizzies or cleaning tablets, are a simple and effective way to keep your toilet fresh, clean, and odor-free. These small, dissolvable tablets are dropped into the toilet bowl, where they fizz and release cleaning agents that help break down stains, eliminate bacteria, and leave behind a pleasant scent. Making toilet bombs at home is not only cost-effective but also allows you to control the ingredients, making them safer and more environmentally friendly compared to many commercial cleaning products.
understanding how toilet bombs work
Toilet bombs work through a chemical reaction between baking soda and an acid, usually citric acid. When the bomb comes into contact with water, these ingredients react to create a fizzing action. This fizz helps loosen dirt, break down grime, and distribute cleaning agents throughout the toilet bowl.
The cleaning power comes from a combination of ingredients that target stains, odors, and bacteria. Baking soda acts as a mild abrasive and deodorizer, while citric acid helps dissolve mineral deposits and stains. Additional ingredients such as essential oils provide fragrance, and sometimes hydrogen peroxide or vinegar is used to enhance cleaning strength.
basic ingredients needed
Making toilet bombs requires only a few simple ingredients, many of which are commonly found in households. The basic ingredients include:
- Baking soda
- Citric acid
- Cornstarch (optional for binding)
- Essential oils for fragrance
- Water or witch hazel in a spray bottle
Baking soda forms the base of the toilet bomb and provides deodorizing properties. Citric acid is the key ingredient that creates the fizzing action. Cornstarch can be added to help bind the mixture and improve the shape of the bombs. Essential oils such as lemon, lavender, eucalyptus, or tea tree add a pleasant scent and may provide antibacterial benefits.
step-by-step process to make toilet bombs
Creating toilet bombs at home is a straightforward process, but it requires careful handling to ensure the mixture does not activate prematurely.
First, combine baking soda and citric acid in a mixing bowl. The typical ratio is about two parts baking soda to one part citric acid. If using cornstarch, add a small amount to the dry mixture and mix thoroughly to ensure even distribution.
Next, add a few drops of your chosen essential oil to the mixture. Stir well to evenly distribute the fragrance throughout the powder. Be cautious not to add too much liquid at once, as this can trigger the fizzing reaction.
Using a spray bottle, lightly mist the mixture with water or witch hazel. The goal is to slightly dampen the mixture so it holds together when pressed, but not so wet that it begins to fizz. This step requires patience, as adding liquid slowly helps maintain the correct consistency.
Once the mixture reaches a texture similar to damp sand, press it firmly into molds. Silicone molds are commonly used because they make it easy to remove the finished bombs. You can also shape them by hand if molds are not available.
Allow the toilet bombs to dry completely for several hours or overnight. Once they are fully hardened, remove them from the molds and store them in an airtight container to prevent moisture from activating them prematurely.
variations and customization
One of the advantages of making toilet bombs at home is the ability to customize them according to your preferences. You can experiment with different scents, colors, and additional cleaning ingredients.
For example, adding a small amount of white vinegar during use can enhance the cleaning effect, although it is not typically included in the bomb itself to avoid premature reaction. Hydrogen peroxide can be used sparingly in the mixture for extra disinfecting properties, but it must be handled carefully.
You can also add natural colorants such as food coloring or powdered herbs to give the bombs a visually appealing appearance. However, it is important to ensure that any additives are safe and will not stain the toilet bowl.
benefits of homemade toilet bombs
Homemade toilet bombs offer several advantages over store-bought alternatives.
First, they are cost-effective. The ingredients used to make them are inexpensive and can produce multiple batches, reducing overall cleaning expenses.
Second, they are environmentally friendly. By using natural ingredients and avoiding harsh chemicals, homemade toilet bombs reduce the impact on water systems and the environment.
Third, they are customizable. You can choose your preferred scents, adjust cleaning strength, and avoid ingredients that may cause allergies or sensitivities.
Finally, they are convenient. Having pre-made toilet bombs allows for quick and easy cleaning without the need for measuring or mixing each time.
proper usage
Using toilet bombs is simple and requires minimal effort. Drop one tablet into the toilet bowl and allow it to fizz and dissolve. The fizzing action will help loosen dirt and distribute the cleaning agents. After the fizzing stops, use a toilet brush to scrub the bowl if necessary, then flush to rinse.
For regular maintenance, using a toilet bomb once or twice a week can help keep the toilet clean and fresh. For tougher stains, additional scrubbing or repeated use may be required.
storage and shelf life
Proper storage is essential to maintain the effectiveness of toilet bombs. Because they react with moisture, they must be kept in a dry, airtight container. Exposure to humidity can cause them to lose their fizzing ability or activate prematurely.
When stored correctly, homemade toilet bombs can last for several weeks to a few months. Keeping them in a cool, dry place ensures they remain effective until use.
safety considerations
While toilet bombs are generally safe, it is important to handle ingredients carefully and follow basic safety guidelines.
Avoid inhaling fine powders such as baking soda and citric acid during preparation. Use gloves if you have sensitive skin, especially when handling essential oils.
Keep toilet bombs out of reach of children and pets, as ingestion could be harmful. Additionally, avoid mixing toilet bombs with strong chemical cleaners, as this can create unwanted reactions.
common mistakes to avoid
When making toilet bombs, there are a few common mistakes that can affect the final product.
Adding too much liquid too quickly can trigger the fizzing reaction prematurely, resulting in a mixture that does not hold its shape. It is important to add moisture gradually and mix thoroughly.
Not pressing the mixture firmly into molds can cause the bombs to crumble after drying. Applying enough pressure ensures they hold together properly.
Storing the bombs in a humid environment can reduce their effectiveness. Always use airtight containers and keep them away from moisture.
maintaining a clean toilet routine
Toilet bombs are most effective when used as part of a regular cleaning routine. Combining them with periodic deep cleaning, proper ventilation, and good hygiene practices ensures a consistently clean and fresh bathroom.
Regular use of toilet bombs helps prevent the buildup of stains, mineral deposits, and odors, making deep cleaning less frequent and less labor-intensive.
conclusion
Making toilet bombs at home is a simple, cost-effective, and environmentally friendly way to maintain a clean and fresh toilet. By combining basic ingredients such as baking soda and citric acid, you can create effective cleaning tablets that fizz away dirt and odors. With proper preparation, storage, and usage, toilet bombs can become a convenient addition to your household cleaning routine. Customizing them with different scents and ingredients allows for a personalized cleaning experience, ensuring that your bathroom remains fresh, hygienic, and pleasant at all times.
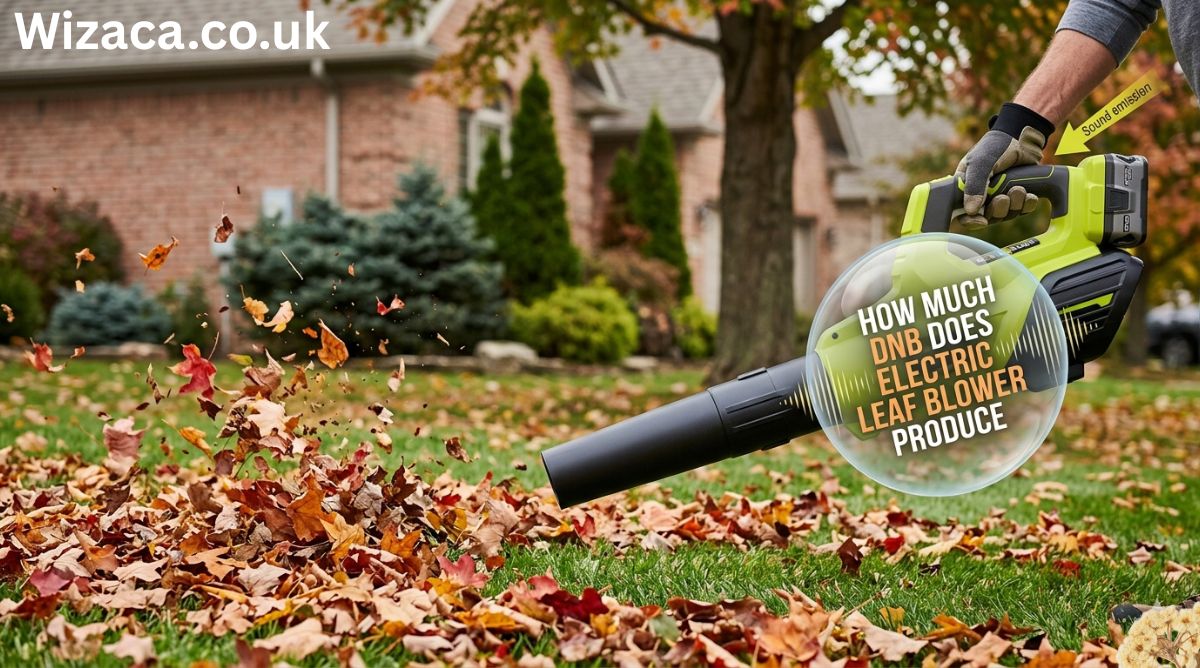
Electric leaf blowers have become an essential tool for homeowners and landscapers looking to maintain clean yards, driveways, and outdoor spaces efficiently. One of the critical considerations when using or purchasing an electric leaf blower is the noise level it produces, often measured in decibels (dB). Understanding how much dB an electric leaf blower produces is important not only for personal comfort but also for compliance with local noise regulations, safety, and the environmental impact of noise pollution. The decibel levels of electric leaf blowers, factors influencing noise production, comparisons with gas-powered blowers, safety measures, and tips to reduce noise while maintaining effective leaf-blowing performance.
understanding decibels (dB)
Decibels (dB) are the units used to measure sound intensity. The decibel scale is logarithmic, meaning that an increase of 10 dB represents a tenfold increase in sound intensity. This means that small changes in dB can have a significant impact on how loud a sound is perceived by the human ear. For reference:
- 30 dB: Whisper
- 50 dB: Normal conversation
- 70 dB: Busy traffic
- 90 dB: Lawnmower or power tools
- 100 dB: Chainsaw or gas-powered leaf blower
Understanding this scale helps in evaluating the impact of an electric leaf blower’s noise on both personal comfort and local surroundings.
typical noise levels of electric leaf blowers
Electric leaf blowers are generally quieter than their gas-powered counterparts. Typical noise levels for electric leaf blowers range from 65 dB to 85 dB, depending on factors like motor type, blower design, and speed settings.
- Corded electric leaf blowers: These are often quieter, producing approximately 65–75 dB. The continuous power supply from an electrical outlet allows for a steady motor operation with minimal vibration and mechanical noise.
- Battery-powered leaf blowers: Battery-powered models typically produce 70–85 dB. While still quieter than gas models, high-speed battery leaf blowers can approach the upper end of this range due to increased airflow and motor demand.
In comparison, gas-powered leaf blowers often exceed 90 dB, making electric models preferable for residential areas and noise-sensitive environments.
factors affecting noise production
Several factors determine the actual dB output of an electric leaf blower:
motor type
Electric leaf blowers use either brushed or brushless motors. Brushless motors are generally quieter because they produce less friction and vibration. This reduces the overall mechanical noise generated during operation.
blower design
The design of the blower, including the shape of the nozzle and the housing of the motor, influences noise production. A well-designed blower housing can minimize sound by reducing vibrations and channeling airflow efficiently.
speed settings
Most modern electric leaf blowers come with variable speed controls. Higher speed settings increase airflow and therefore noise levels. Operating at lower speeds can reduce dB output while still being effective for light leaf clearing.
fan and impeller design
The fan or impeller inside the blower generates airflow, and its design affects noise levels. Larger, well-balanced impellers produce smoother airflow with fewer turbulent sounds, leading to lower decibel levels.
environmental conditions
Noise can be amplified or dampened depending on the surrounding environment. Hard surfaces like concrete reflect sound, potentially increasing perceived loudness, while grass and soft landscaping absorb sound, reducing noise impact.
health and safety considerations
Exposure to high noise levels can have long-term effects on hearing. According to occupational safety guidelines:
- Exposure to sounds above 85 dB over extended periods can cause hearing damage.
- Electric leaf blowers that produce 70–85 dB are generally safe for short-term use without hearing protection, but prolonged use should still include safety measures.
Using hearing protection, taking breaks, and operating blowers at lower speed settings when possible can minimize the risk of hearing damage.
comparison with gas-powered leaf blowers
Electric leaf blowers are significantly quieter than gas-powered models. Gas-powered blowers typically produce 90–100 dB or more due to engine combustion noise, exhaust, and mechanical vibration. This difference makes electric blowers more suitable for residential areas where noise ordinances may restrict loud equipment use. Additionally, electric blowers produce no exhaust emissions, further enhancing their suitability for environmentally conscious users.
noise reduction tips
To minimize the dB output and impact of electric leaf blowers:
- Choose a quieter model: Research decibel ratings before purchase; manufacturers often list dB levels.
- Use lower speed settings: Reduce motor speed when full power is unnecessary to lower noise output.
- Maintain equipment: Clean and lubricate moving parts regularly to prevent extra noise from friction or imbalance.
- Operate during appropriate hours: Avoid early mornings or late evenings in residential areas to reduce disturbance.
- Use sound-dampening accessories: Some leaf blowers offer attachments or covers that reduce noise.
regulations and local ordinances
Many municipalities have rules governing acceptable noise levels for outdoor power equipment. Electric leaf blowers are often allowed to be used during specific hours to minimize disruption. It is important to check local regulations to ensure compliance. Operating a leaf blower that exceeds permitted dB levels could result in fines or complaints from neighbors.
environmental impact of noise
Noise pollution from leaf blowers can affect not only humans but also wildlife. Birds, small mammals, and pets can be disturbed by prolonged exposure to high dB levels. Electric leaf blowers with lower noise output are generally less disruptive to the local ecosystem compared to gas-powered alternatives.
choosing the right electric leaf blower
When selecting an electric leaf blower, consider both performance and noise output. Key considerations include:
- dB rating: Choose a blower within a comfortable decibel range, ideally below 85 dB for residential use.
- Motor power and airflow: Ensure the blower provides sufficient airflow (measured in cubic feet per minute, CFM) and airspeed (miles per hour, MPH) to handle your yard size.
- Weight and ergonomics: A lighter, ergonomically designed blower reduces operator fatigue and encourages safer handling.
- Battery life or cord length: Ensure sufficient runtime or reach to complete tasks without frequent interruptions.
Balancing noise level, power, and convenience is key to selecting an effective electric leaf blower.
conclusion
Electric leaf blowers typically produce between 65 and 85 dB, making them significantly quieter than gas-powered models. The actual noise level depends on motor type, blower design, speed settings, and environmental factors. Understanding dB output is crucial for personal comfort, hearing safety, and compliance with local noise regulations. By choosing a suitable model, maintaining equipment, and using proper operating practices, homeowners can effectively manage yard cleanup while minimizing noise impact. Electric leaf blowers offer a practical, quieter, and environmentally friendly solution for keeping outdoor spaces clean and tidy.

Properly torquing Echelon screws is essential to ensure mechanical stability, safety, and longevity of equipment. Echelon screws are commonly used in various applications, including industrial machinery, electronics assembly, and structural installations. Applying the correct torque prevents issues like component loosening, material deformation, or failure of the threaded connection. how tight Echelon screws need to be torqued, factors affecting torque requirements, tools to use, step-by-step instructions, and maintenance best practices.
understanding torque
Torque is the rotational force applied to a screw or bolt to achieve a secure connection without over-tightening. It is measured in units such as Newton-meters (Nm) or foot-pounds (ft-lb). Proper torque ensures:
- Mechanical Integrity: Prevents the screw from loosening due to vibrations or operational stress.
- Load Distribution: Ensures that pressure is evenly distributed along the threads and connected surfaces.
- Component Protection: Prevents stripping, cracking, or deformation of the screw or the material it fastens.
- Safety: Reduces the risk of structural failure in critical assemblies.
Understanding torque is the first step in determining how tight Echelon screws should be.
factors affecting torque requirements
Several factors influence the torque needed for Echelon screws:
- Screw Size and Thread Type: Larger diameter screws or fine threads typically require higher torque than smaller screws.
- Material of Screws and Mating Components: Steel, aluminum, or plastic materials have different strength and yield characteristics.
- Lubrication: Lubricated threads reduce friction, allowing the screw to achieve the same clamping force with less torque.
- Application and Load: Screws under high mechanical stress or vibration may require higher torque for secure fastening.
- Environmental Conditions: Exposure to heat, moisture, or chemicals can affect thread friction and torque retention.
Considering these factors is crucial when setting the torque specification for your Echelon screws.
recommended torque specifications
Manufacturers typically provide torque specifications for Echelon screws, often in technical manuals or datasheets. If specific values are unavailable, standard torque ranges based on screw size and material can be used as guidelines. For instance:
- M3 Screws: 0.5–1.0 Nm
- M4 Screws: 1.5–2.5 Nm
- M5 Screws: 2.5–4.5 Nm
- M6 Screws: 5–7 Nm
Always consult the Echelon screw datasheet to ensure compliance with recommended torque. Applying torque outside the recommended range can lead to under-tightening or over-tightening, both of which may compromise performance.
tools for torquing echelon screws
Using the correct tools ensures accuracy and repeatability when torquing Echelon screws:
- Torque Wrenches: Adjustable wrenches calibrated to measure and apply precise torque values.
- Electronic Torque Drivers: Provide digital torque settings with high precision, ideal for sensitive applications.
- Torque Screwdrivers: Suitable for small screws where hand tools may not provide accurate torque.
- Calibrated Socket Wrenches: Useful for larger Echelon screws in industrial assemblies.
Always verify tool calibration before use to ensure accurate torque application.
step-by-step process to torque echelon screws
- Check Specifications: Refer to the manufacturer’s datasheet for torque value, screw size, and material compatibility.
- Prepare Components: Ensure screws and threaded holes are clean and free from debris. Lubricate threads if recommended.
- Set Torque Tool: Adjust the torque wrench or screwdriver to the desired torque value.
- Insert Screw: Hand-tighten the screw to seat it properly before applying final torque.
- Apply Torque: Gradually tighten the screw until the torque tool indicates the target value has been reached. Avoid jerking or sudden force.
- Verify Tightness: Check all screws in the assembly for consistency, especially in multi-screw setups where torque distribution is critical.
- Recheck After Use: In high-vibration environments, inspect and re-torque screws periodically to maintain secure fastening.
Following a systematic approach prevents errors and ensures optimal screw performance.
common mistakes when torquing screws
Improper torquing can cause multiple issues:
- Over-Torquing: Can strip threads, break screws, or deform components.
- Under-Torquing: Leads to loose connections, increased vibration, and eventual failure.
- Uneven Torque: Applying inconsistent torque in multi-screw assemblies can cause stress concentration and warping.
- Ignoring Lubrication: Dry or dirty threads can result in incorrect torque readings and uneven clamping force.
- Using Uncalibrated Tools: Results in inaccurate torque application, risking structural integrity.
Avoiding these mistakes is essential for safe and effective use of Echelon screws.
maintenance and re-torquing
Regular maintenance ensures long-term reliability:
- Periodic Inspection: Check screws for loosening, corrosion, or damage.
- Re-Torquing Schedule: Depending on application, re-torque screws after initial installation and periodically thereafter.
- Replacement: Replace worn or damaged screws immediately to maintain structural integrity.
- Documentation: Record torque values, inspection dates, and maintenance activities for critical assemblies.
Proper maintenance prolongs the life of your equipment and prevents costly failures.
conclusion
Knowing how tight to torque your Echelon screws is essential for maintaining safety, reliability, and performance. Factors such as screw size, material, lubrication, and application type influence the appropriate torque. Using proper tools, following manufacturer guidelines, and adhering to systematic torquing procedures ensures optimal fastening. Avoiding common mistakes and performing regular maintenance will keep Echelon screws secure and functioning correctly over time. By carefully applying the correct torque, users can maximize the durability and effectiveness of their assemblies while minimizing the risk of mechanical failure.

Who is Diven Labollita? Biography, Career, and Updates

How Much is Juan Ibarra Worth? Net Worth and Earnings (2026)

activities brought to you by lookwhatmomfound lwmfcrafts

Does a Check Engine Light Fail Inspection?

How to Adjust U-Haul Mirrors for Safe Driving

How to Load a 10′ U-Haul Truck Efficiently
-

 Health2 weeks ago
Ingredients in Siwzozmix458 Safe to Use: Complete Safety Guide
-

 General2 weeks ago
9043415725: Unknown Number Details and Information
-

 General2 weeks ago
6042390192 Full Details and Information Explained
-

 General1 week ago
6043953585: Official Contact Information
-

 Home Decor5 days ago
look what mom found fathead wall graphic giveaway
-
 Lifestyle5 days ago
activities brought to you by lookwhatmomfound lwmfcrafts
-

 General2 weeks ago
9313717320: Everything You Need to Know About This Number
-

 Technology1 week ago
Download Software tgd170.fdm.97 New Release: Latest Version