
Blog
how to edit 100s on 404 skin osu

Understanding how to edit 100s on 404 skin osu is important for players who want to customize their gameplay visuals and improve clarity during intense rhythm sessions. In osu, skins control nearly every visual element you see on screen, including hit circles, sliders, approach circles, score numbers, and judgment results such as 300, 100, 50, and miss. The 404 skin is a popular custom skin known for its clean design and competitive oriented layout. However, many players want to adjust the appearance of the 100 judgment to better match their preferences, improve visibility, or maintain visual consistency with other edited elements. Editing 100s requires understanding how osu skins are structured, how image assets work, and how the game loads visual components from skin folders.
Understanding osu Skin Structure
Before learning how to edit 100s on 404 skin osu, it is essential to understand how osu organizes skins. Every osu skin is stored in a dedicated folder inside the Skins directory of the game installation. Inside that folder, you will find image files, configuration files, and sometimes sound files.
The most important file for structural settings is the skin configuration file, commonly named skin.ini. This file controls general behavior, combo colors, font scaling, hit circle overlap, and other visual parameters. However, judgment graphics such as 100 are typically controlled by image files rather than configuration text.
Judgment elements appear when you hit objects in the game. The number 300 indicates a perfect hit, 100 indicates a good hit, 50 indicates a weak hit, and miss appears when timing is incorrect. Each of these results is usually represented by individual image assets stored in the skin folder.
Locating the 100 Judgment Files
To proceed with how to edit 100s on 404 skin osu, open the 404 skin folder. Inside, look for files named similarly to hit100.png or hit100@2x.png. The exact naming may vary depending on whether the skin supports high resolution scaling.
The standard resolution file is usually named hit100.png. The high resolution version, designed for HD displays, often includes @2x in the filename. If both versions exist, you should edit both to maintain consistency across different display settings.
If you do not see these files immediately, make sure hidden extensions are visible in your operating system. Sometimes image extensions are hidden by default, making it harder to identify file types.
Backing Up the Original Skin
Before making any changes, create a backup copy of the 404 skin folder. This step is critical when learning how to edit 100s on 404 skin osu because accidental file corruption or incorrect formatting can cause the skin to display incorrectly in game.
Copy the entire folder and rename it to something like 404 backup or 404 custom edit. This ensures you can revert to the original version if needed.
Choosing the Right Editing Software
Editing judgment graphics requires image editing software that supports transparency. PNG files in osu skins rely heavily on transparent backgrounds to blend seamlessly with gameplay elements.
Programs such as Photoshop, GIMP, Krita, or other advanced editors are suitable. Even some lightweight editors can work as long as they preserve alpha transparency and do not compress the image improperly.
Avoid using basic editors that remove transparency or convert PNG files into formats that osu does not recognize properly.
Understanding Dimensions and Alignment
When exploring how to edit 100s on 404 skin osu, it is important to maintain the original image dimensions unless you intentionally want to change size. osu positions judgment graphics based on their canvas dimensions.
If you enlarge or shrink the canvas incorrectly, the 100 may appear off center or misaligned during gameplay. It is usually best to open the existing hit100 file and edit directly within the same canvas size.
If resizing is desired, make proportional adjustments and test frequently in game to ensure the visual result appears balanced.
Editing the Visual Design of 100
Once the file is open in your editor, you can modify the number style, color, glow, outline, shadow, or add special effects. Some players prefer brighter 100 judgments to make them more noticeable. Others prefer muted tones to reduce distraction.
The 404 skin typically emphasizes clarity and minimalism. When editing, consider maintaining consistency with the rest of the skin’s aesthetic. For example, if the 300 judgment uses a specific glow or font style, aligning the 100 visually can create a cohesive experience.
You can adjust hue and saturation to change color. You can apply outer glow effects for better visibility. You can modify stroke thickness to make the number more readable during fast gameplay.
Preserving Transparency
A critical part of how to edit 100s on 404 skin osu is ensuring transparency remains intact. The background around the number must be fully transparent. If the background becomes white or opaque, it will appear as a box during gameplay.
Always export the file as PNG with alpha transparency enabled. Double check by reopening the exported file before placing it back into the skin folder.
Replacing the Edited File
After completing your edits, save the file with exactly the same name as the original, replacing the existing hit100 file in your custom skin folder.
If high resolution versions exist, repeat the editing process for the @2x version. Maintain consistent proportions between standard and HD versions to prevent scaling inconsistencies.
Reloading the Skin in Game
After replacing the file, open osu and navigate to settings. Select a different skin temporarily, then switch back to your edited 404 skin. This forces the game to reload the assets.
Play a short map and observe the 100 judgment. Check for alignment, clarity, brightness, and overall integration with gameplay elements.
If the 100 appears blurry, confirm that you edited the correct resolution file. If it appears misaligned, recheck canvas size and anchor positioning.
Adjusting Animation and Fade Behavior
Judgment graphics in osu often fade out automatically. While the fade timing is generally controlled by the game engine, the appearance of motion can be influenced by image design.
Adding subtle gradients or glow effects can create a smoother visual fade. Conversely, using harsh outlines may make the disappearance feel abrupt.
Understanding this subtle visual perception helps refine how to edit 100s on 404 skin osu in a way that enhances gameplay comfort.
Editing Fonts and Consistency
Some skins use custom font elements for score numbers. If the 100 judgment is part of a themed font set, ensure the style matches other numeric elements.
Consistency improves visual harmony. For competitive players, too much variation between 300 and 100 can create unnecessary distraction.
Matching font thickness, curvature, and glow intensity can create a balanced appearance.
Testing in Different Background Conditions
Maps in osu have varying background brightness and colors. After editing, test the 100 judgment in maps with bright backgrounds and dark backgrounds.
A color that looks good on a dark background may be difficult to see on a bright one. If necessary, adjust brightness or add subtle outlines to improve contrast.
This testing phase is crucial when mastering how to edit 100s on 404 skin osu effectively.
Performance Considerations
Large image files can slightly increase memory usage. While modern systems handle this easily, it is still recommended to avoid excessively large dimensions or unnecessary visual effects.
Keep file size optimized without sacrificing quality. Use proper PNG compression settings if available in your editing software.
Advanced Customization Techniques
For advanced users, layering techniques can create dynamic visual depth. You can design multiple versions of 100 and experiment with slight variations in glow intensity.
You can also coordinate color changes across 50, 100, and 300 judgments to create a visual hierarchy. For example, maintaining a gradient progression from weakest to strongest hit result can enhance clarity.
Advanced editors allow blending modes and subtle drop shadows that improve readability without overpowering gameplay visuals.
Maintaining Competitive Visibility
In fast rhythm gameplay, visual clarity is more important than decoration. While creative edits are appealing, excessive glow, heavy blur, or extreme brightness can distract from hit circles and approach timing.
When refining how to edit 100s on 404 skin osu, prioritize readability and minimal obstruction.
Troubleshooting Common Issues
If the edited 100 does not appear in game, confirm that the filename matches exactly. Check for accidental file extension changes. Ensure the PNG format is correct.
If the image appears stretched or pixelated, verify that dimensions match the original resolution.
If the game crashes or displays errors, revert to your backup and re edit carefully.
Conclusion
Learning how to edit 100s on 404 skin osu involves understanding skin structure, locating judgment image files, preserving transparency, maintaining correct dimensions, and testing changes thoroughly in game. By carefully modifying the hit100 graphics while keeping visual consistency and performance in mind, players can personalize their gameplay experience without sacrificing clarity or competitive efficiency. With proper backups, thoughtful design choices, and attention to detail, editing the 100 judgment in the 404 skin becomes a straightforward and rewarding customization process that enhances both aesthetics and gameplay comfort.
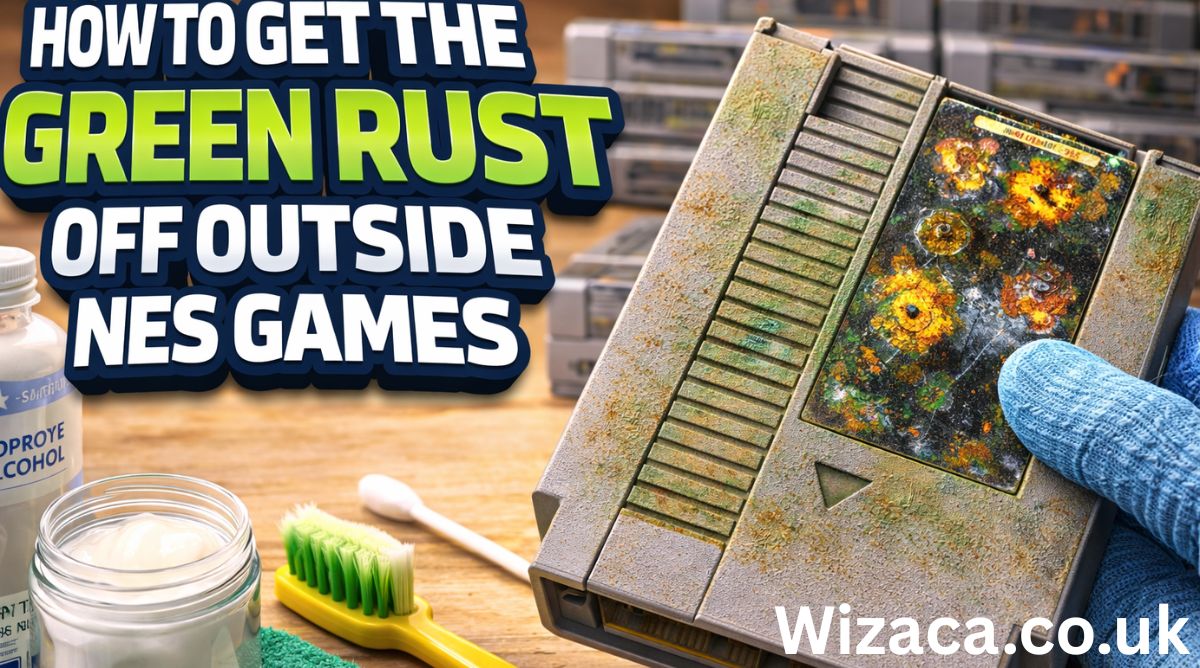
Learning how to get the green rust off outside NES games is important for collectors, retro gaming enthusiasts, and anyone restoring classic cartridges. The Nintendo Entertainment System, commonly known as the NES, used plastic cartridges with internal metal screws and shielding. Over time, these metal components can develop green corrosion on the outer screws or around exposed metal areas. This green substance is often oxidation, typically copper oxide or corrosion formed from moisture exposure. While it may look alarming, it can usually be removed safely with proper tools and techniques. Cleaning corrosion correctly helps preserve both the appearance and structural integrity of your vintage cartridges.
Understanding What the Green Rust Is
Before learning how to get the green rust off outside NES games, it is important to understand what causes it. The green discoloration is usually oxidation that forms when metal reacts with moisture and oxygen. If the screws are made of brass or coated metal, oxidation can appear green. High humidity, improper storage, and exposure to damp environments accelerate this process. While surface corrosion may not immediately damage gameplay, it can spread over time and weaken screws or cause staining around the cartridge shell.
Inspecting the Cartridge Carefully
Begin by examining the cartridge thoroughly. Look at the screws on the back, the edges of the plastic shell, and any visible metal components. Ensure that the corrosion is limited to the outer screws and not spreading inside. If green residue appears near seams, you may need to open the cartridge to check for internal damage. Careful inspection prevents unnecessary cleaning steps and helps you determine how serious the corrosion is.
Preparing a Safe Cleaning Area
When learning how to get the green rust off outside NES games, prepare a clean and well lit workspace. Place a soft cloth or mat on the table to prevent scratches. Wear gloves to protect your hands from cleaning solutions and corrosion residue. Gather basic tools such as cotton swabs, microfiber cloths, a small soft brush, white vinegar, baking soda, isopropyl alcohol, and a screwdriver compatible with NES cartridge screws. Proper preparation ensures safe and controlled cleaning.
Removing Surface Corrosion Without Opening the Cartridge
If the corrosion is limited to screw heads and does not appear severe, you may not need to open the cartridge. Lightly dampen a cotton swab with white vinegar and gently rub the affected screw head. Vinegar helps dissolve oxidation. Avoid soaking the area excessively, as too much liquid can seep into the cartridge. After applying vinegar, wipe the area with a dry cloth. If residue remains, repeat gently. Finish by wiping with a cloth lightly dampened with isopropyl alcohol to remove remaining moisture.
Opening the Cartridge for Deeper Cleaning
If corrosion appears heavy or spreading, open the cartridge carefully. NES cartridges typically require a specialized security screwdriver. Once opened, separate the plastic shell halves gently. Inspect the inside for additional corrosion near metal shielding or screws. If the internal circuit board appears unaffected, focus only on the corroded metal parts. Keeping liquids away from the board is critical when learning how to get the green rust off outside NES games safely.
Cleaning Corroded Screws
Remove corroded screws from the cartridge shell. Soak them briefly in a small container with white vinegar for several minutes. Monitor closely and avoid long soaking times, which could weaken metal. After soaking, scrub gently with a soft brush to remove loosened oxidation. Rinse with clean water and dry thoroughly with a cloth. Allow screws to air dry completely before reinstalling. Ensuring they are fully dry prevents future corrosion.
Using Baking Soda Paste
For stubborn green rust, create a paste using baking soda and a small amount of water. Apply the paste directly onto the corroded area using a cotton swab. Let it sit for several minutes. Gently scrub with a soft brush. Baking soda acts as a mild abrasive and neutralizes acidic residue. Wipe clean and dry thoroughly afterward.
Cleaning Plastic Around Corrosion
Sometimes green rust stains the plastic shell. To clean stained plastic, use a cloth dampened with isopropyl alcohol. Rub gently to lift discoloration. Avoid harsh scrubbing that may scratch the surface. Never use strong solvents that can melt or discolor plastic. Preserving the original shell is important for maintaining collector value.
Preventing Liquid Damage to Circuit Boards
If you opened the cartridge, take extreme care not to spill liquids onto the circuit board. If accidental moisture contacts the board, dry it immediately using a lint free cloth and allow complete air drying before reassembly. Electronics and moisture do not mix, so caution is essential when learning how to get the green rust off outside NES games.
Reassembling the Cartridge
Once all components are clean and completely dry, reassemble the cartridge carefully. Ensure the circuit board sits correctly in its guides. Align the shell halves and reinsert screws securely but without overtightening. Over tightening can crack plastic or strip threads.
Testing the Cartridge
After reassembly, insert the cartridge into your NES console and test gameplay. Confirm that it loads properly. If any issues occur, reopen and inspect internal contacts to ensure no residue remains. Proper cleaning should not affect functionality if performed carefully.
Preventing Future Corrosion
Prevention is key after learning how to get the green rust off outside NES games. Store cartridges in a cool, dry environment. Avoid basements or areas with high humidity. Use silica gel packets in storage boxes to reduce moisture. Keep cartridges inside protective cases when not in use. Proper storage greatly reduces the chance of recurring oxidation.
Regular Maintenance Tips
Inspect cartridges periodically for early signs of corrosion. Wipe outer surfaces with a dry microfiber cloth occasionally. Avoid touching metal screws with wet hands. Keeping cartridges clean and dry maintains both appearance and functionality.
Avoiding Harsh Methods
Do not use steel wool, metal brushes, or aggressive sandpaper on screw heads while they are attached to the cartridge. These tools can scratch plastic and leave debris behind. Avoid chemical rust removers designed for heavy machinery, as they may damage plastic surfaces. Gentle household solutions are sufficient for most cases.
Understanding Collector Value
Many NES cartridges hold nostalgic and collector value. Maintaining original components and avoiding visible damage preserves their worth. Cleaning corrosion carefully improves appearance without reducing authenticity. Replacing severely damaged screws with similar originals can also help maintain aesthetic consistency.
When Replacement Is Necessary
If screws are severely corroded beyond cleaning, replacing them may be the safest option. Ensure replacements match the original size and style to maintain compatibility and appearance. Always keep original parts if possible for historical value.
Environmental Factors to Consider
Humidity is the primary cause of green oxidation. Using a dehumidifier in storage areas can protect not only NES cartridges but also other retro electronics. Stable temperature and moisture control are long term preservation strategies.
Final Thoughts
Understanding how to get the green rust off outside NES games allows you to restore and preserve classic cartridges safely. Green corrosion forms due to moisture exposure and metal oxidation, but with careful inspection, gentle cleaning using vinegar or baking soda, thorough drying, and proper storage practices, you can effectively remove it without damaging your games. Taking preventive steps such as controlling humidity and storing cartridges properly ensures long term preservation. With patience and careful handling, your NES games can remain clean, functional, and visually appealing for many years to come.

The KARR security system is a sophisticated vehicle and property protection solution designed to provide users with advanced control, monitoring, and anti-theft features. Popular among car owners and property managers, KARR systems offer features such as remote start, immobilization, alarm notifications, and keyless entry. While the system is generally user-friendly, understanding how to operate it effectively ensures maximum protection, convenience, and longevity. This article provides a comprehensive guide on how to use the KARR security system, covering setup, key functions, troubleshooting, maintenance, and best practices.
Understanding the KARR Security System
KARR security systems are electronic devices that integrate multiple security functions into one platform. They typically include:
- Central Control Module: The brain of the system that manages sensors, alarms, and communication with remote controls.
- Remote Key Fobs: Handheld devices that allow the user to arm or disarm the system, activate alarms, and remotely start vehicles if supported.
- Sensors and Detectors: Components such as door sensors, shock sensors, motion sensors, and tilt sensors that detect unauthorized access or tampering.
- Alarms and Sirens: Audible alerts designed to deter intruders and notify owners of security breaches.
- Immobilization Features: Functions that prevent the engine from starting or disable certain electrical components in case of unauthorized access.
The KARR security system is designed to protect both vehicles and property by providing real-time alerts, active deterrence, and remote monitoring capabilities.
Advantages of Using KARR Security System
- Enhanced Security: The system combines multiple security features to protect against theft, break-ins, and unauthorized access.
- Remote Access: Users can control the system remotely through key fobs, mobile apps (if supported), or other interfaces.
- Convenience Features: Many KARR systems include remote start, keyless entry, and customizable alarm settings.
- Customizable Alerts: The system can provide notifications for tampering, unauthorized movement, or impact detection.
- Integration Capability: Some KARR models can be integrated with additional sensors, GPS modules, or home security systems for comprehensive protection.
Understanding these benefits helps users appreciate the full potential of the system and encourages proper usage.
Preparing the KARR Security System for Use
Before using a KARR security system, certain preparations are necessary to ensure proper operation.
Installation Check
Verify that the system is installed correctly, whether it is a vehicle or property setup. Proper installation ensures that all sensors, wiring, and modules are functioning correctly. Improper installation can lead to false alarms, malfunctions, or reduced effectiveness.
Power Source Verification
Ensure that the system is connected to a reliable power source. For vehicles, the KARR system is usually wired to the car battery and ignition system. For property systems, ensure that the unit is connected to a stable electrical supply and, if applicable, a backup battery.
Remote Control Preparation
Familiarize yourself with the remote key fobs or mobile interfaces. Ensure that the batteries are fully charged or replaced if necessary. Having functional remotes is critical for arming, disarming, and activating features like remote start.
Familiarize with the Manual
Reading the official user manual or documentation provided with the KARR system is essential. The manual provides detailed instructions for setup, configuration, and use, as well as troubleshooting tips. Knowing these details reduces the likelihood of errors and ensures optimal system performance.
Using the KARR Security System: Basic Functions
Once the system is prepared, understanding the basic functions is the next step.
Arming and Disarming the System
Arming the system activates all sensors and prepares the system to respond to unauthorized access. This can be done via the remote key fob or control interface. Disarming deactivates the sensors and allows normal operation of the vehicle or property.
Steps for Arming:
- Press the arm button on the remote or interface.
- Observe the indicator lights or audible confirmation that the system is armed.
Steps for Disarming:
- Press the disarm button on the remote.
- Confirm that the system has disengaged through indicator lights or audible signals.
Using Remote Start (If Available)
Many KARR systems include remote start functionality for vehicles, allowing users to start the engine without physically entering the car. This feature can be useful in extreme weather conditions or for pre-heating the engine.
Steps for Remote Start:
- Ensure the vehicle is in park with the parking brake engaged.
- Press the remote start button on the key fob.
- Wait for confirmation signals, such as blinking lights or engine sound, indicating that the engine has started.
Alarm Activation and Response
The alarm system is a key component of KARR security. When a sensor detects unauthorized access, it triggers audible alarms and may send notifications. Users should be familiar with responding to alarms:
- Identify the source of the alarm through visual or audible indicators.
- Use the remote to disarm the system if authorized access is verified.
- Check for any potential tampering or damage caused by an attempted intrusion.
Using Immobilization Features
The immobilizer prevents unauthorized engine starts or disables certain functions. Engaging this feature adds an additional layer of protection.
Steps for Using Immobilizer:
- Ensure the system is armed before activating immobilization.
- Follow the remote or control interface instructions to engage or disengage the immobilizer.
- Verify functionality by testing the engine start in a controlled environment.
Sensor Management
KARR systems often allow customization of sensor sensitivity and zones. Proper configuration reduces false alarms while maintaining security.
Steps for Sensor Management:
- Access the system settings through the remote interface or control panel.
- Adjust sensitivity levels according to environmental conditions.
- Test sensors to ensure accurate detection without frequent false triggers.
Advanced Features and Settings
KARR security systems may offer advanced settings depending on the model:
- Two-Way Communication: Some systems provide feedback to the remote, confirming the status of the vehicle or property.
- Panic Mode: Allows the user to activate the alarm manually in case of immediate danger.
- Silent Arm/Disarm: Enables silent operation without audible signals for discreet security.
- Integration with GPS Tracking: Provides location monitoring for vehicles or property if equipped with GPS modules.
Understanding and using these features maximizes the functionality of the KARR security system.
Troubleshooting Common Issues
Even with proper usage, users may encounter issues. Common problems include:
Remote Not Responding
- Check the battery in the key fob and replace if necessary.
- Ensure the remote is within the operational range.
- Re-sync the remote with the control module following manufacturer instructions.
False Alarms
- Adjust sensor sensitivity to match the environment.
- Check for loose wiring or improperly installed sensors.
- Ensure environmental factors such as vibrations or pets are accounted for in sensor placement.
System Not Arming
- Verify power supply and check for blown fuses or disconnected wires.
- Ensure the immobilizer or other features are not preventing arming.
- Consult the manual for system reset procedures if necessary.
Alarm Does Not Trigger
- Check sensor connections and test each sensor individually.
- Ensure that settings for alarm triggers are correctly configured.
- Replace faulty sensors or control modules if required.
Maintaining Your KARR Security System
Regular maintenance ensures long-term reliability and effectiveness.
- Check Battery Levels: Both in the remote and backup systems.
- Clean Sensors: Remove dust, dirt, or obstructions that may affect detection.
- Test System Regularly: Arm and disarm, test remote start, and check alarms to ensure functionality.
- Update Firmware: If supported, keep system software up to date for improved performance and security features.
Best Practices for Using KARR Security System
- Always arm the system when leaving the vehicle or property.
- Customize sensor sensitivity to reduce false alarms without compromising security.
- Replace remote batteries regularly to ensure responsiveness.
- Avoid tampering with wiring or control modules, as this may reduce effectiveness or void warranty.
- Use immobilization features in combination with alarms for maximum protection.
Conclusion
The KARR security system offers comprehensive protection for vehicles and properties, combining alarms, sensors, immobilization, and remote control features. Proper understanding of system functions, careful installation, regular maintenance, and correct use of advanced features are critical to maximizing its effectiveness. Users who follow best practices can enjoy enhanced security, convenience, and peace of mind while minimizing the risk of false alarms or malfunctions.
By familiarizing themselves with arming and disarming procedures, remote start functionality, sensor management, and troubleshooting, users can leverage the full capabilities of the KARR security system. With consistent attention to maintenance, firmware updates, and battery care, the system can provide reliable protection over the long term, ensuring safety for both vehicles and property.

YELL51‑OUZ4 is a term people often search for when they want to understand how to use a specific item, tool, or product that is identified by that code. This guide explains in clear and practical detail what YELL51‑OUZ4 is generally understood to be, how it works, how to prepare for its use, how to apply it in real situations, important safety precautions, common mistakes to avoid, and tips to get the best results. The goal of this article is to provide a complete understanding of how to use YELL51‑OUZ4 in a way that is easy to follow and useful for readers.
What YELL51‑OUZ4 Is
When people refer to YELL51‑OUZ4, they are usually talking about a chemical‑based cleaning and stain‑removal solution designed to help remove tough residues from different types of surfaces. The concept behind products with codes like this is typically consistent: they contain cleaning agents that break down stubborn dirt, oils, stains, adhesives, or buildup that ordinary household cleaners cannot remove easily.
These types of products are made to be strong yet usable on a variety of materials. They are formulated in a way that allows the active ingredients to penetrate and dissolve unwanted materials so they can be wiped or rinsed away. Depending on the exact composition, YELL51‑OUZ4 can be used on surfaces like tile, metal, glass, concrete, fabric, and other items that require deep cleaning.
Why You Might Need YELL51‑OUZ4
There are many everyday scenarios where stronger cleaning solutions are necessary. For example, kitchens and bathrooms often accumulate grease and mineral deposits that regular detergents can’t handle. In automotive or workshop settings, tools and equipment may collect oil or paint splatters that need a more powerful solution. Outdoor surfaces like patios and concrete walkways can develop stubborn stains from weather exposure.
In all of these situations, a formulated cleaner labeled YELL51‑OUZ4 helps by breaking down these tough residues, making it easier to remove them without excessive scrubbing. People also use such products when preparing surfaces for repainting, refinishing, or restoration work, because it helps ensure the new material adheres properly.
How YELL51‑OUZ4 Works
Understanding how YELL51‑OUZ4 works helps you use it more effectively. Cleaning solutions of this type usually rely on a combination of chemical agents that can dissolve or loosen the bonds between dirt and the surface. These agents are designed to interact with different types of contaminants, such as:
- Oils and greases
- Ink and dye stains
- Paint or varnish residues
- Mineral deposits from hard water
- Rust or oxidation spots
- Adhesives and tape residues
When applied correctly, these cleaning agents weaken the attachment of the stain or residue, which allows it to be wiped or rinsed away more easily. These kinds of products are stronger and more concentrated than everyday soaps, so they should be used with intention and care.
Preparing to Use YELL51‑OUZ4
Proper preparation is important before applying YELL51‑OUZ4. Taking the right safety and setup steps will make the cleaning process more effective and prevent damage or irritation.
Identify the Surface
First, determine what kind of surface you’re planning to treat. Surfaces range from highly durable materials like stone or metal to delicate ones like fabric or painted wood. Some materials tolerate stronger cleaners better than others, so identifying the surface helps you adjust your approach.
Protect Surrounding Areas
If you are working near other surfaces that should not be cleaned with a strong solution, consider protecting them with tape, cloth, or covering sheets. This prevents accidental splashes or drips from affecting nearby finishes.
Ventilate the Area
Good ventilation is key when using chemical cleaning products. Open windows and doors or use a fan to ensure fresh air can circulate. Ventilation reduces the concentration of fumes and makes the cleaning process safer and more comfortable.
Wear Protective Gear
Because products like YELL51‑OUZ4 may contain strong cleaning agents, it is highly recommended to wear protective gloves. Eye protection is also advisable if there is a risk of splashing. Clothing that covers exposed skin helps avoid irritation.
Test on a Small Area
Before applying the product across a large or visible area, always test it on a small, inconspicuous spot. This patch test tells you whether the surface reacts poorly, shows discoloration, or becomes damaged. If any negative effect is observed, discontinue use on that surface.
Step‑by‑Step Instructions for Using YELL51‑OUZ4
The following steps provide a structured process to follow when using YELL51‑OUZ4 for tough stains and deep cleaning.
Step One: Clear the Area
Remove loose debris, dust, or dirt from the surface. Use a dry cloth, brush, or vacuum to remove anything that might interfere with the cleaning process. Removing loose material helps the cleaner work more directly on the stain itself.
Step Two: Apply the Product to the Stain
Apply the cleaner directly to the problem area. If the product is liquid, pour or spray it carefully so that the stain is fully covered. For thicker or semi‑solid stains, use enough liquid to saturate the surface without creating excessive runoff.
Step Three: Let It Penetrate
Allow the solution to sit on the stain for a period of time. The exact duration depends on how stubborn the stain is, but typically five to ten minutes is sufficient for most applications. This waiting period lets the cleaning agents break down the stain bonds.
Step Four: Gently Agitate the Surface
After allowing the cleaner to work, gently scrub or agitate the surface with a soft brush or cloth. For hard surfaces, a brush with moderate bristles helps loosen dissolved residue. For softer materials, a gentle cloth is recommended to avoid damage.
Step Five: Wipe or Rinse Away
Once the stain has been loosened, wipe the area with a clean cloth. For some surfaces, you may need to rinse with clean water to ensure all cleaning agents and residue are fully removed. After rinsing, dry the surface thoroughly.
Step Six: Repeat if Necessary
Stubborn stains may require a second application. If the first attempt did not fully remove the residue, repeat the steps above until the stain is gone. Always allow the surface to dry between applications so you can accurately assess how much cleaner is still needed.
Special Considerations for Different Surfaces
When using YELL51‑OUZ4, the type of surface you are cleaning affects how you should approach it. Some materials are more resilient, while others require extra care.
Hard Surfaces
Surfaces like tile, stone, concrete, and metal tolerate strong cleaners well. Apply the product, allow it to work, and then scrub with a medium‑firm brush. After cleaning, rinse with water and dry. Hard surfaces usually handle repeated applications without damage.
Glass Surfaces
Glass can be cleaned effectively, but avoid abrasive brushes that can scratch. Use soft cloths for application and removal. Wiping with a dry cloth after rinsing helps prevent streaks.
Fabrics and Upholstery
Delicate fabrics are sensitive to strong cleaners. Use a minimal amount of product, and avoid soaking the material. After treating the stain, rinse gently and allow to air dry. Always conduct a patch test first.
Painted or Finished Wood
Surfaces with paint or sealant may discolor or weaken if exposed to strong chemical cleaners. Apply the product only where necessary and use very light agitation. If any damage occurs, stop immediately.
Safety Precautions
Using a chemical cleaner like YELL51‑OUZ4 safely involves more than just following the application steps. Safety precautions reduce the risk of irritation, harm, or accidental damage.
Wear Personal Protective Equipment
Always wear gloves to protect your skin. Eye protection is recommended when splashes are likely. Avoid direct contact with untreated skin.
Work in a Ventilated Area
Fumes from powerful cleaning products can be irritating if inhaled in a confined space. Proper ventilation disperses fumes and creates a safer environment.
Keep Out of Reach of Children and Pets
Strong cleaners should be stored securely where children or pets cannot access them. Accidental ingestion or skin contact can pose serious health risks.
Handle Spills Carefully
If the product spills, clean it up immediately with absorbent material. Dispose of any waste according to local regulations. Never leave spills unattended, especially on floors or surfaces people walk on.
Common Mistakes to Avoid
Avoiding mistakes ensures a more effective and safer cleaning process.
Using Excessive Amounts
Applying too much cleaner does not speed up the cleaning process. Instead, use only what is needed to cover the stain and follow the recommended dwell time. Overuse can make rinsing more difficult and may leave residue.
Not Testing First
Skipping the patch test increases the risk of damaging the surface. Always test first, even if the material seems durable.
Scrubbing Too Hard
Strong scrubbing on delicate surfaces can cause scratches, discoloration, or wear. Use gentle motions on soft materials and appropriate brushes on hard ones.
Ignoring Warning Signs
If a surface begins to discolor or react negatively during cleaning, stop immediately. Continuing can cause permanent damage that may be difficult or expensive to reverse.
Tips for Best Results
To maximize the effectiveness of YELL51‑OUZ4, consider these tips:
- Work in small sections so you can focus on each stain thoroughly.
- Allow adequate dwell time for the cleaner to penetrate the stain.
- Rinse and dry surfaces fully to prevent residue buildup.
- Use the appropriate tool (cloth, brush, or sponge) for the surface type.
- Maintain regular cleaning so stubborn stains do not develop in the first place.
Final Thoughts
Learning how to use YELL51‑OUZ4 effectively means understanding the nature of the surface, preparing properly, applying the product carefully, and following through with correct safety procedures. With proper technique, a product like YELL51‑OUZ4 helps remove tough stains and deeply embedded dirt that ordinary cleaners cannot handle.
This guide provides a complete walkthrough of the process, from preparation and application to safety and maintenance. By following these instructions, anyone can use YELL51‑OUZ4 in a practical and informed way to achieve the best possible cleaning results.

How to disassemble cosmetics once human

how to download from funker530.com

how to edit 100s on 404 skin osu
Can You Rent a Storage Unit for a Month?

Does Air Have a Mass?
Are Tennis Shoes Business Casual? Here’s What Fashion Experts Say
-

 Automotive2 weeks ago
How to Replace Windshield Washer Nozzle for 2013 Jeep Patriot
-

 Beauty1 week ago
how to make your own cleansing oil
-

 Technology2 weeks ago
How to Set Honuras Time Zone on a WR20BAR G-Shock
-

 Education2 weeks ago
how to print a report card in powerschool
-

 Electronics1 week ago
how to pair 2 jbl eon 715 speakers together
-

 Automotive2 weeks ago
How to Replace Transmission Seal on A1078 Corvette
-

 Cleaning2 days ago
how to make bath towels soft again
-

 Food2 days ago
how to make fruit and veggie wash