
Automotive
Does Low Hybrid Battery Cause Low Braking Power?
Yes, low hybrid battery power can potentially affect braking performance in hybrid vehicles, but it’s not a direct cause of “low braking power” in the traditional sense. Hybrid vehicles utilize a combination of a gasoline engine and an electric motor, with the hybrid battery (typically a high-voltage lithium-ion or nickel-metal hydride battery) playing a key role in powering the electric motor and assisting in braking systems, especially in regenerative braking.
Let’s take a closer look at how a low hybrid battery could influence braking performance:
How Braking Works in Hybrid Vehicles
1. Regenerative Braking
- One of the key features of hybrid vehicles is regenerative braking. In this system, when you press the brake pedal, the electric motor acts as a generator and converts the vehicle’s kinetic energy (motion) back into electrical energy. This energy is then stored in the hybrid battery.
- Regenerative braking not only helps to recharge the hybrid battery but also reduces wear on the traditional braking components (like the brake pads and rotors).
2. Traditional Braking
- Hybrid vehicles also have traditional hydraulic braking systems (just like conventional vehicles) for emergency braking or when regenerative braking is not sufficient. This system is completely independent of the hybrid battery.
How Low Hybrid Battery Power Can Affect Braking
1. Impact on Regenerative Braking
- If the hybrid battery charge is low, the regenerative braking system may not function at full capacity. The vehicle may attempt to use the electric motor to regenerate and store energy, but if the battery is too low, it may not be able to accept and store the energy being generated.
- In this case, you may notice that the vehicle’s braking feels less responsive or less efficient, as regenerative braking is not able to assist as much. The vehicle will rely more on traditional braking, which could cause a slight change in braking feel or effectiveness.
2. Braking Power May Not Be Significantly Reduced
- Low hybrid battery power is more likely to affect the efficiency of braking (mainly regenerative braking) rather than directly causing low braking power. The hydraulic braking system will continue to work normally, and you should still have full control over stopping the vehicle in emergency or high-demand situations.
3. Battery Charge and Braking Feel
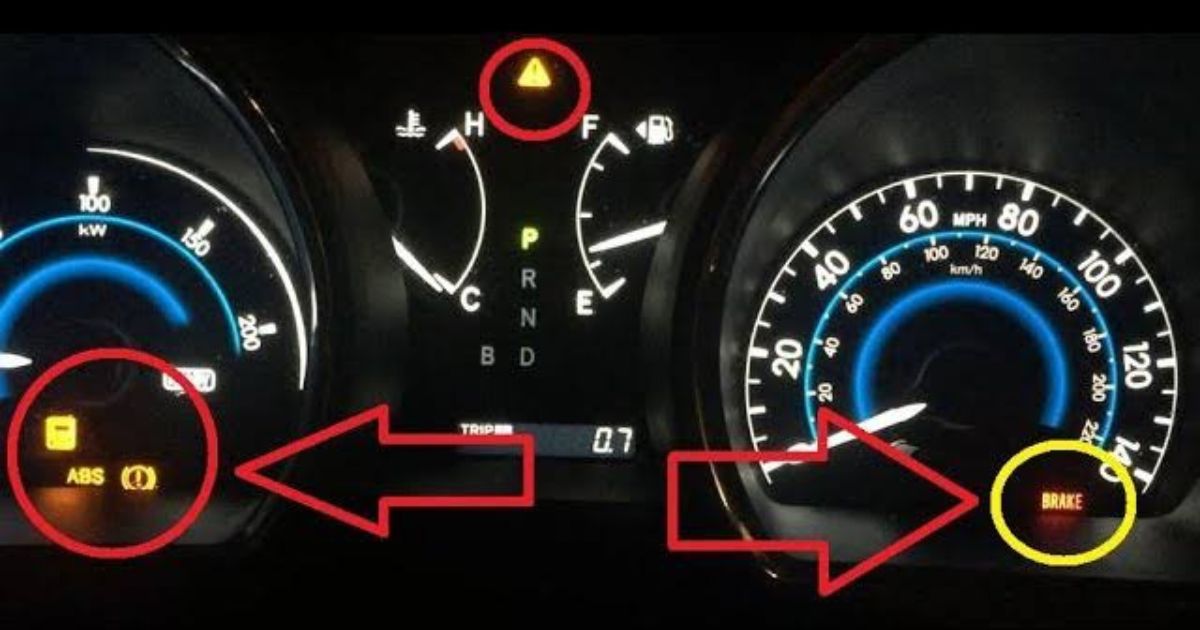
- In some hybrid vehicles, a low hybrid battery charge may trigger a system warning, and you may experience reduced regenerative braking power. However, the overall braking power (i.e., your ability to stop the car) is generally not compromised in the traditional sense.
Other Possible Issues Linked to Low Hybrid Battery Charge
1. Reduced Efficiency
- A low hybrid battery can affect the overall fuel economy and driving performance of the vehicle, as the electric motor won’t assist as much in acceleration or deceleration. This can result in lower fuel efficiency and potentially higher engine loads.
2. Warning Indicators
- If the hybrid battery is low or failing, the vehicle’s system may alert you with warning lights or messages on the dashboard. It’s essential to monitor these indicators and take your vehicle in for inspection and service to avoid more significant issues.
Conclusion
In conclusion, while low hybrid battery power can affect the performance of regenerative braking, it does not directly cause low braking power in the traditional sense. The vehicle will still have access to hydraulic braking and should be able to stop effectively. However, regenerative braking efficiency may decrease, and the vehicle may rely more on traditional brakes, which could feel different.
If you experience any significant braking issues or a lack of braking power, it’s essential to have your vehicle inspected by a professional to rule out any other problems, including those related to the braking system or hybrid battery.
Also Check:
• Does Brake Fluid Remove Car Paint
• Does Brake Dust Mean I Need New Brakes
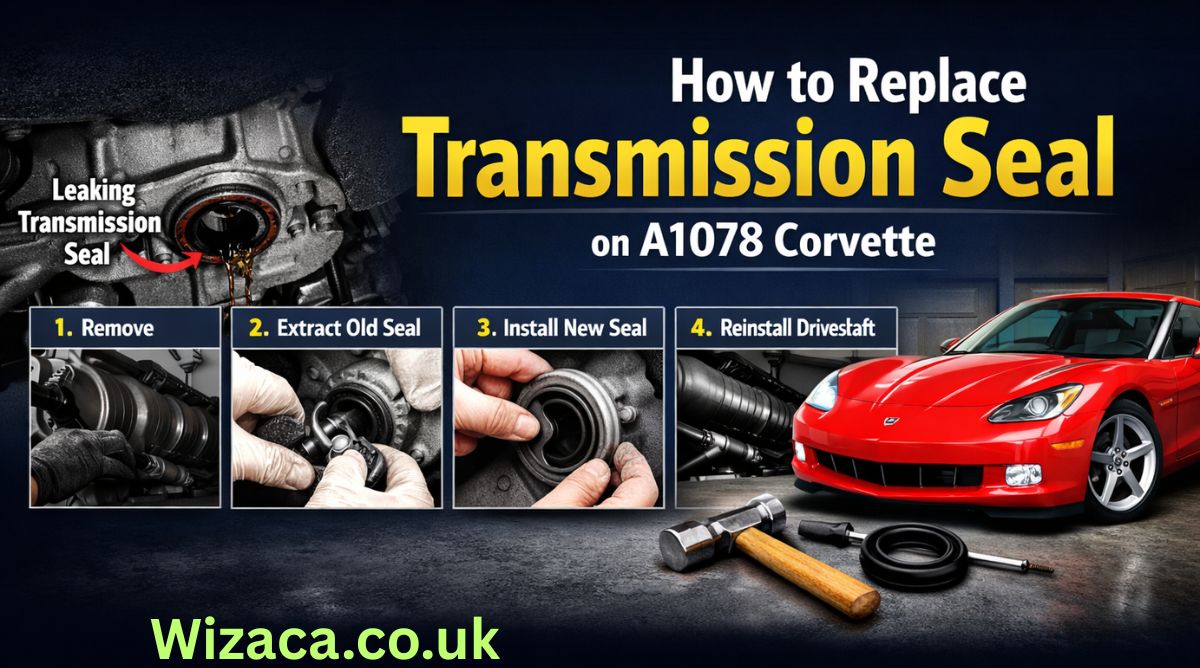
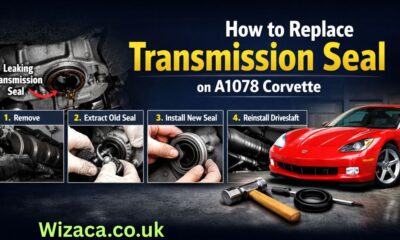
The A1078 Corvette is an iconic sports car known for its performance, precision engineering, and high reliability. One important maintenance task that ensures smooth performance and prevents leaks is replacing the transmission seal. The transmission seal plays a critical role in maintaining fluid integrity within the transmission, preventing leaks that could lead to transmission damage or failure. Over time, seals can degrade due to heat, pressure, and wear, making replacement necessary to maintain optimal performance. how to replace the transmission seal on an A1078 Corvette, along with tools required, safety considerations, troubleshooting, and maintenance tips.
Understanding the Transmission Seal
Transmission seals are rubber or synthetic components designed to prevent fluid leaks where the transmission interfaces with other parts, such as the engine, driveshaft, or valve body. In the A1078 Corvette, the most common seal that requires replacement is the input or output shaft seal, often referred to as the rear main seal for the transmission. These seals are subjected to constant pressure, high temperatures, and rotational forces. A worn or damaged seal can result in transmission fluid leaks, low fluid levels, increased wear on transmission components, and eventually, costly repairs if not addressed promptly. Understanding the purpose and location of the seal is critical for proper replacement.
Signs of a Failing Transmission Seal
Before proceeding with replacement, it is important to recognize the symptoms of a failing transmission seal. Common signs include visible fluid leaks beneath the vehicle, transmission fluid stains on the driveway, a low transmission fluid level despite regular topping off, unusual noises from the transmission, or difficulty shifting gears. Timely replacement of the seal at the first signs of leakage prevents further damage to the transmission and ensures the vehicle continues to operate efficiently. Ignoring a worn seal can lead to overheating, increased friction, and permanent damage to transmission components.
Tools and Materials Required
Replacing the transmission seal on an A1078 Corvette requires careful preparation and the correct tools. Essential tools include a floor jack, jack stands, socket set, wrench set, screwdrivers, seal puller, and a seal installation tool or driver. Additionally, you will need a replacement transmission seal specifically designed for the A1078 Corvette, high-quality transmission fluid, and rags or towels for cleaning. Having the proper tools and materials ensures that the replacement process is safe, efficient, and precise, reducing the risk of damage to the transmission or surrounding components.
Preparing the Vehicle for Maintenance
Safety is paramount when performing any transmission maintenance. Begin by parking the Corvette on a level surface and engaging the parking brake. Wear protective gloves and safety glasses to prevent injury from transmission fluid or debris. Lift the vehicle using a floor jack and support it securely on jack stands, ensuring it is stable before working underneath. Remove the transmission cover or splash guard if present to access the transmission pan and seal area. Proper preparation minimizes the risk of injury and ensures that the replacement process can be carried out smoothly.
Draining Transmission Fluid
Before removing the transmission seal, it is necessary to drain the transmission fluid. Place a drain pan beneath the transmission pan and remove the drain plug, allowing fluid to flow out completely. If the transmission does not have a drain plug, the pan may need to be removed carefully to prevent spillage. Draining the fluid reduces mess during seal removal and prevents contamination of the new seal. Inspect the fluid for metal shavings or discoloration, which may indicate additional transmission wear that needs attention. Replacing the fluid with high-quality transmission fluid after the seal installation is essential for optimal performance.
Removing the Transmission Pan
After draining the fluid, the next step is to remove the transmission pan if necessary. Use a socket set to loosen and remove the bolts securing the pan to the transmission. Carefully lower the pan and clean it thoroughly, removing any gasket material or debris. Removing the pan provides clear access to the transmission seal and internal components. Be cautious to avoid damaging the pan or gasket surface, as a proper seal is necessary to prevent leaks after reassembly. Inspect the pan for signs of wear, rust, or damage, and replace it if necessary.
Accessing the Transmission Seal
With the pan removed, the transmission seal is usually accessible at the input or output shaft, depending on the specific configuration of the A1078 Corvette. In some cases, the driveshaft may need to be disconnected to access the seal fully. Use appropriate tools to remove the driveshaft or related components carefully. Take note of the orientation and positioning of all parts removed, as this will assist in reassembly. Documenting the process or taking photos can help ensure that reinstallation is accurate and prevents mistakes that could cause leaks or misalignment.
Removing the Old Transmission Seal
Removing the old transmission seal requires care to avoid damaging the transmission housing or shaft. Use a seal puller or a flathead screwdriver to gently pry the seal out of its seating. Be careful not to scratch the shaft or housing, as imperfections can prevent the new seal from seating properly. Clean the area thoroughly with a rag and a suitable cleaner to remove any residual fluid, dirt, or debris. Inspect the shaft for wear, scoring, or damage, which could compromise the new seal. If the shaft is damaged, consider consulting a professional or replacing the affected component before installing the new seal.
Installing the New Transmission Seal
Proper installation of the new transmission seal is critical for preventing leaks. Apply a thin layer of clean transmission fluid or appropriate lubricant to the seal’s inner edge to facilitate smooth installation. Position the seal carefully over the shaft and press it evenly into its seating. Use a seal installation tool or a socket of appropriate diameter to gently tap the seal into place, ensuring it is flush with the housing. Avoid striking the seal too hard or at an angle, as this can deform the seal and compromise its effectiveness. Proper installation ensures a long-lasting seal that prevents fluid leaks and maintains transmission integrity.
Reassembling Components
After the seal is installed, reassemble any components removed during the process. Reattach the driveshaft or related parts, ensuring proper alignment and secure fastening. Reinstall the transmission pan with a new gasket if required, tightening the bolts to the manufacturer’s torque specifications. Ensure that all connections are secure and that no components are pinched or misaligned. Correct reassembly prevents leaks, rattling, or transmission damage during operation. Double-check all components and fasteners before proceeding to refill the transmission fluid.
Refilling Transmission Fluid
Once the transmission seal and pan are properly installed, refill the transmission with the recommended type and quantity of transmission fluid for the A1078 Corvette. Use a funnel to prevent spillage and check the fluid level using the transmission dipstick while the engine is running. Proper fluid level ensures smooth shifting, lubrication of internal components, and cooling of the transmission. Overfilling or underfilling can cause performance issues or damage, so follow the manufacturer’s guidelines closely. Regularly checking the fluid level after replacement helps confirm that the seal is functioning correctly and that there are no leaks.
Testing and Verification
After completing the replacement and refilling the transmission fluid, it is important to test the vehicle. Start the engine and allow it to reach operating temperature. Shift through all gears and observe for smooth engagement, unusual noises, or fluid leaks. Inspect the area around the new seal and transmission pan for signs of leakage. A proper test ensures that the seal has been installed correctly and that the transmission is operating efficiently. Monitoring the vehicle over the next few days can help identify any issues early and confirm the success of the replacement.
Common Issues and Troubleshooting
Even after proper installation, some issues may arise. If there are leaks, check that the seal is seated correctly and that the pan gasket is intact. Inspect the torque on bolts and ensure all components were reinstalled in the correct order. Air trapped in the transmission system can sometimes cause irregular fluid levels; running the vehicle through gear cycles helps release trapped air. If persistent issues occur, consult a professional mechanic for further inspection. Regular monitoring and maintenance prevent long-term transmission damage and ensure consistent performance.
Maintenance Tips for Transmission Seals
Maintaining the transmission seal involves routine inspections and proper fluid management. Check the transmission fluid level and condition regularly, and replace it according to the manufacturer’s recommended intervals. Avoid harsh driving conditions that can increase heat and pressure in the transmission, as this accelerates seal wear. Keeping the transmission clean and free from contaminants prolongs the life of the seal. Addressing minor leaks early prevents larger problems and extends the overall lifespan of the transmission system. Proper care ensures the A1078 Corvette continues to perform at its best.
Conclusion
Replacing the transmission seal on an A1078 Corvette is a critical maintenance task that ensures smooth operation, prevents fluid leaks, and protects the transmission from damage. By understanding the function of the transmission seal, recognizing signs of failure, gathering the necessary tools, preparing the vehicle, draining fluid, removing and installing the seal carefully, reassembling components, refilling fluid, and testing the system, Corvette owners can maintain peak performance and reliability. Routine maintenance and monitoring of the transmission and seals contribute to the longevity of this high-performance sports car. Following these steps ensures that the A1078 Corvette continues to deliver a smooth, safe, and reliable driving experience while protecting one of its most essential mechanical components.
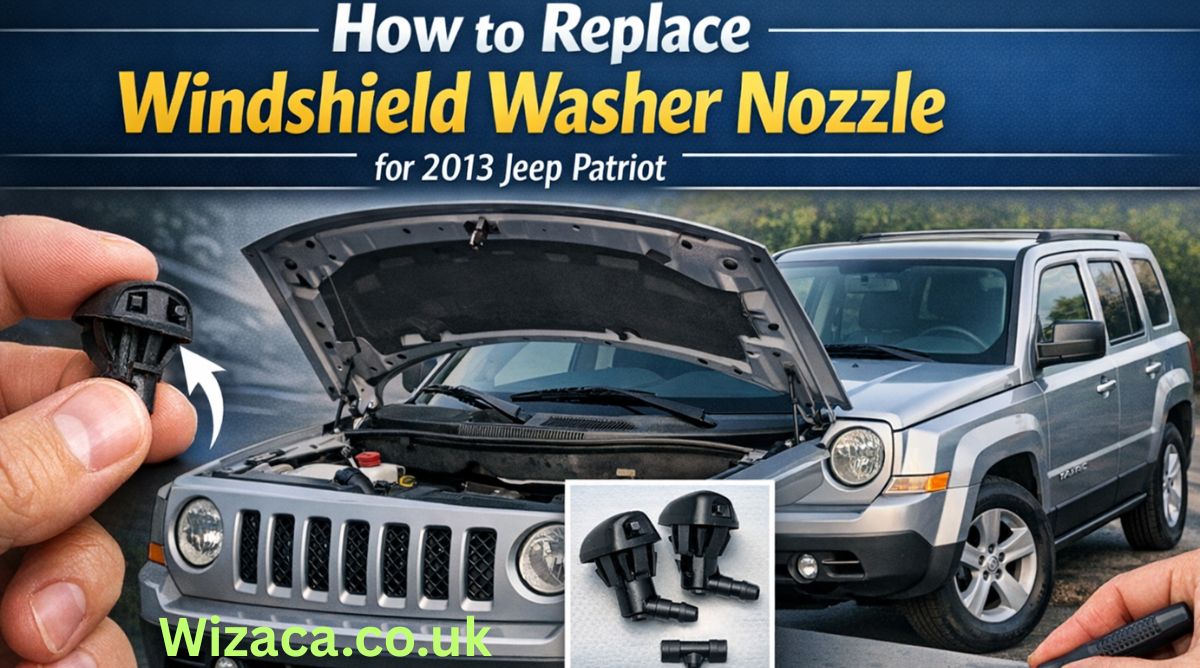
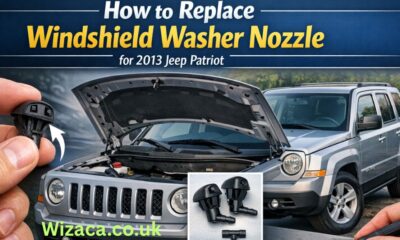
The 2013 Jeep Patriot is known for its rugged design, versatility, and ease of maintenance. One of the common maintenance tasks for the 2013 Jeep Patriot involves replacing the windshield washer nozzles. Windshield washer nozzles are small but critical components that ensure clear visibility by spraying washer fluid onto the windshield. Over time, these nozzles may become clogged, misaligned, or damaged, reducing their effectiveness. Knowing how to replace them properly not only restores optimal functionality but also contributes to overall vehicle safety. how to replace the windshield washer nozzle for a 2013 Jeep Patriot, along with tips for maintenance and troubleshooting.
Understanding Windshield Washer Nozzles
Windshield washer nozzles are designed to direct washer fluid onto the windshield in a controlled spray pattern. They are connected to the washer fluid reservoir via flexible tubing and are usually mounted on the hood or the wiper arms. The 2013 Jeep Patriot uses dual nozzles positioned on the hood to ensure even coverage across the windshield. Over time, debris, dirt, or mineral deposits from the washer fluid can clog the nozzles. Physical damage from accidents, collisions, or hoods being struck during maintenance can also necessitate replacement. Understanding the structure and function of the nozzle helps ensure the replacement is done correctly and prevents future problems.
Tools and Materials Required
Before beginning the replacement process, it is important to gather all necessary tools and materials. For the 2013 Jeep Patriot, these typically include a flathead screwdriver, needle-nose pliers, a replacement windshield washer nozzle set compatible with the 2013 model, and optionally a small towel to catch washer fluid spills. Having the proper tools ensures that the replacement is efficient and avoids accidental damage to the hood, tubing, or other components. Ensuring the replacement nozzles are genuine or compatible with Jeep specifications guarantees proper fitment and spray performance.
Preparing the Vehicle
Safety and preparation are crucial steps before starting any maintenance task. Begin by parking the Jeep Patriot on a flat, stable surface and turning off the engine. Engage the parking brake to prevent accidental movement. Open the hood fully and secure it with the hood prop rod. It is advisable to wear gloves to protect your hands from washer fluid and sharp edges under the hood. Also, placing a small towel or rag beneath the nozzles can help catch any washer fluid that may spill during the replacement process, preventing staining on the engine or hood.
Locating the Windshield Washer Nozzles
The windshield washer nozzles on the 2013 Jeep Patriot are mounted on the hood, near the base of the windshield. Each nozzle connects to the washer fluid tubing that runs from the washer fluid reservoir. To locate the nozzles, visually inspect the hood and trace the tubing from the reservoir to the nozzle outlets. Identifying the correct nozzles ensures that the replacement targets the appropriate components and avoids unnecessary disassembly of other parts. Taking a photo of the existing setup before removal can serve as a reference during installation.
Removing the Old Nozzle
Once the nozzles are located, the next step is removal. Use a flathead screwdriver or needle-nose pliers to gently pry the nozzle from its mounting hole on the hood. Be careful not to scratch or dent the hood surface. Detach the washer fluid tubing connected to the nozzle by pressing on the release clip or carefully pulling it off. Keep track of the tubing orientation, as reinstalling it incorrectly can affect spray direction and functionality. In some cases, debris may have accumulated around the nozzle, so cleaning the area with a damp cloth ensures a smooth fit for the new nozzle.
Inspecting and Cleaning the Tubing
Before installing the new nozzle, inspect the washer fluid tubing for any cracks, blockages, or damage. Clogged tubing can reduce fluid flow even after nozzle replacement. If necessary, flush the tubing with clean water or compressed air to remove any debris. Ensuring that the tubing is clean and intact prevents future issues and prolongs the life of the new nozzle. Also, check the washer fluid reservoir for adequate fluid levels and clean the reservoir cap to prevent contamination.
Installing the New Nozzle
Installation of the new windshield washer nozzle is straightforward but requires precision. Insert the nozzle into the hood mounting hole, ensuring it snaps securely into place. Reconnect the washer fluid tubing to the new nozzle, making sure it is firmly attached. The orientation of the nozzle should align with the windshield to produce an even spray pattern. Gently test the nozzle to verify that it fits snugly without tilting or wobbling. Proper installation prevents leaks, misdirected sprays, and damage during hood closure.
Testing the New Nozzle
After installing the new nozzles, testing is essential to confirm correct functionality. Fill the washer fluid reservoir if necessary and activate the windshield washer system from the control stalk inside the vehicle. Observe the spray pattern and coverage on the windshield. Adjust the nozzle angle if needed by gently moving the nozzle tip with a small tool or your fingers to ensure even fluid distribution. Ensuring that both nozzles provide consistent coverage across the windshield enhances visibility and driver safety.
Common Issues and Troubleshooting
Even after replacement, some issues may arise. If the nozzles do not spray properly, check for blockages in the tubing or incorrect nozzle alignment. Air bubbles in the tubing can sometimes prevent proper fluid flow; running the washer system for a few seconds often resolves this. Ensure that the washer fluid pump is functioning correctly and that the reservoir contains sufficient fluid. Re-check the connections to confirm that they are secure and free from leaks. Regular inspection and maintenance can prevent these common issues and maintain optimal performance.
Tips for Maintaining Windshield Washer Nozzles
Maintaining the windshield washer nozzles of your 2013 Jeep Patriot is crucial for long-term functionality. Use filtered or distilled washer fluid to prevent mineral buildup that can clog nozzles. Avoid using the washer system on dry glass, as debris or dirt can scratch the windshield and damage the nozzle tip. Regularly inspect the nozzles for cracks or misalignment, especially after extreme weather conditions or car washes. Keeping the hood and nozzle area clean prevents debris accumulation and ensures consistent performance.
When to Replace Windshield Washer Nozzles
Understanding when to replace the nozzles can save time and prevent driving hazards. Replace nozzles if the spray pattern becomes irregular, if fluid leaks from the nozzle base, or if physical damage is visible. Clogged nozzles that cannot be cleaned effectively also require replacement. Timely replacement ensures that the windshield washer system functions correctly, contributing to safer driving conditions, particularly during rain, snow, or dusty environments.
Advantages of Proper Nozzle Replacement
Replacing windshield washer nozzles properly offers several advantages. It restores clear visibility by ensuring an even spray of washer fluid, improves overall vehicle safety, and prevents long-term damage to the windshield caused by improper cleaning. Additionally, proper installation avoids unnecessary strain on the washer pump and extends the lifespan of the entire windshield washer system. Ensuring correct function also provides peace of mind during travel and enhances the overall maintenance of the 2013 Jeep Patriot.
Conclusion
Replacing the windshield washer nozzle for a 2013 Jeep Patriot is a straightforward maintenance task that significantly impacts vehicle safety and visibility. By understanding the function of the nozzles, gathering the necessary tools, preparing the vehicle, carefully removing the old nozzles, inspecting and cleaning tubing, installing new nozzles, and thoroughly testing them, Jeep owners can maintain an effective washer system. Regular inspection and proper maintenance prevent future problems and ensure that the windshield remains clean and clear under all driving conditions. Following these steps ensures that the windshield washer system operates reliably and provides the safety benefits intended by the vehicle’s design. Proper care of this small but essential component demonstrates attention to vehicle maintenance and contributes to the longevity and performance of the 2013 Jeep Patriot.
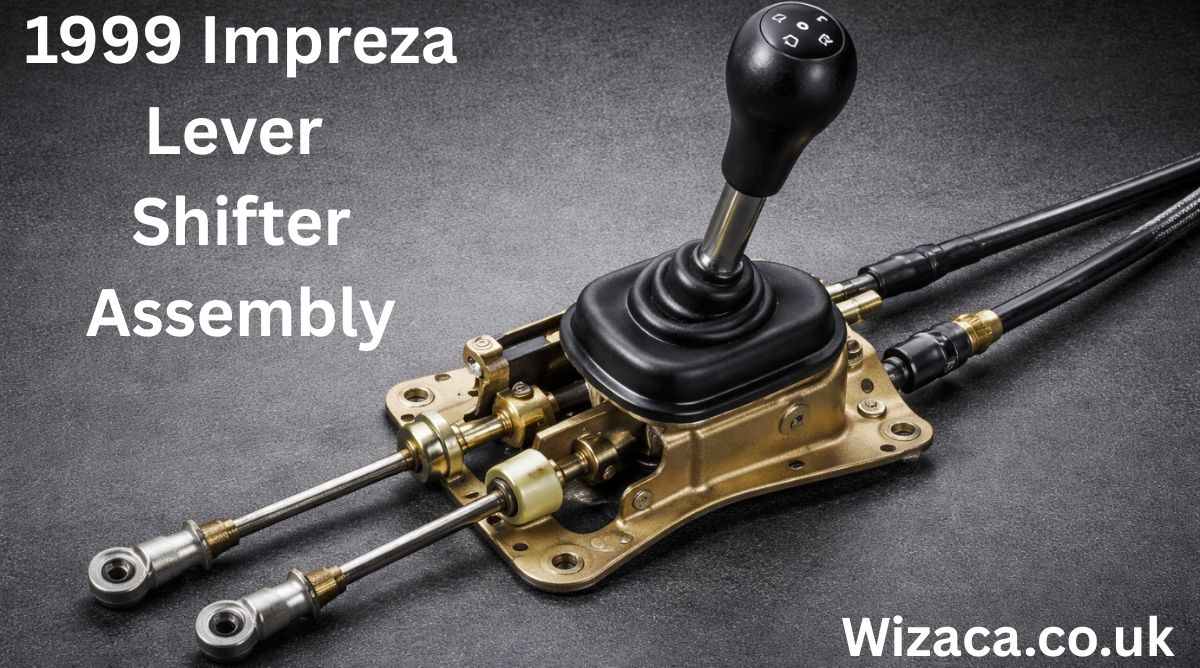
The 1999 Impreza lever shifter assembly is a critical mechanical component that directly affects how the driver interacts with the vehicle’s transmission. In manual transmission models especially, the shifter assembly plays a major role in gear selection, driving comfort, responsiveness, and overall driving feel. Understanding how this assembly works, its components, common issues, maintenance needs, and upgrade possibilities is essential for owners, mechanics, and automotive enthusiasts.
Introduction to the 1999 Impreza Lever Shifter Assembly
The lever shifter assembly is the physical mechanism that connects the driver’s hand movements to the transmission. In the 1999 Impreza, this system was designed with durability and simplicity in mind, balancing cost-effective engineering with reliable performance.
Although it may appear simple from the cabin, the shifter assembly is a carefully engineered system involving multiple mechanical parts working together to ensure smooth and accurate gear changes.
Importance of the Shifter Assembly in Vehicle Operation
The shifter assembly is essential because it translates driver input into mechanical action within the transmission. A properly functioning shifter ensures accurate gear engagement, minimizes wear, and enhances driving control.
Key roles of the shifter assembly include:
- Selecting gears accurately
- Providing tactile feedback to the driver
- Maintaining alignment with transmission linkages
Any issue in this system can significantly affect drivability.
Overview of the 1999 Impreza Transmission System
The 1999 Impreza commonly came with a manual transmission option, making the lever shifter assembly especially important. The shifter does not directly engage gears but operates through linkages that connect to the transmission selector mechanism.
This indirect system allows flexibility, vibration isolation, and smoother shifting under varying driving conditions.
Main Components of the Lever Shifter Assembly
The lever shifter assembly is composed of several interconnected parts, each serving a specific function.
Primary components include:
- Shift lever
- Pivot ball
- Bushings
- Shift linkage rods
- Retaining clips and fasteners
Each part must function correctly for smooth gear selection.
The Shift Lever Design and Function
The shift lever is the visible and most frequently used part of the assembly. In the 1999 Impreza, the lever is typically made of metal for strength and durability.
The lever’s length and angle influence:
- Shift throw distance
- Driver comfort
- Shift precision
A balanced design ensures ease of use and responsiveness.
Pivot Ball and Its Mechanical Role
The pivot ball sits near the base of the shift lever and allows it to move freely in multiple directions. This spherical joint is critical for enabling the lever to engage different gear positions.
Wear in the pivot ball can cause:
- Excessive play
- Loose shifting feel
- Reduced accuracy
Proper lubrication and fit are essential.
Bushings and Their Importance
Bushings are small components, often made of rubber or plastic, that reduce vibration and friction between moving parts.
In the 1999 Impreza shifter assembly, bushings:
- Isolate vibrations from the transmission
- Improve shift smoothness
- Maintain proper alignment
Over time, worn bushings are one of the most common causes of sloppy shifting.
Shift Linkage Rods Explained
The shift linkage rods connect the lever assembly to the transmission selector shaft. These rods transmit motion and determine how accurately gear changes occur.
Properly aligned linkage rods ensure:
- Precise gear engagement
- Reduced transmission wear
- Consistent shifting behavior
Bent or worn rods can lead to misalignment.
Retaining Clips and Mounting Hardware
Small but crucial, retaining clips and fasteners keep the assembly securely connected. These parts prevent unwanted movement and maintain structural integrity.
Failure of clips or fasteners can cause:
- Sudden loss of shift control
- Increased noise
- Unsafe driving conditions
They must always be properly installed.
How the Lever Shifter Assembly Works
When the driver moves the shift lever, the motion pivots around the pivot ball and transfers through the linkage rods to the transmission. The transmission then engages the selected gear.
This process requires:
- Precise alignment
- Minimal friction
- Secure mounting
Any looseness reduces shift quality.
Driving Feel and Shift Feedback
The 1999 Impreza is known for offering a relatively direct and mechanical shift feel. The lever shifter assembly plays a major role in this characteristic.
Good shift feedback provides:
- Confidence during gear changes
- Better control during spirited driving
- Clear indication of gear engagement
Worn components reduce this feedback.
Common Wear Issues in the Shifter Assembly
Over time, normal use causes wear in various parts of the shifter assembly.
Common wear-related problems include:
- Loose or sloppy shifter
- Difficulty engaging certain gears
- Increased vibration
These issues often develop gradually.
Symptoms of a Failing Shifter Assembly
Drivers may notice several signs indicating shifter assembly problems.
Typical symptoms include:
- Excessive side-to-side movement
- Grinding during gear changes
- Unusual noises when shifting
Early diagnosis helps prevent further damage.
Causes of Shifter Assembly Problems
Several factors contribute to wear and failure.
Common causes include:
- High mileage
- Aggressive shifting habits
- Lack of maintenance
Environmental factors such as dirt and moisture can also accelerate wear.
Inspection of the Lever Shifter Assembly
Regular inspection helps identify issues before they become severe.
Inspection typically involves:
- Checking for looseness
- Inspecting bushings for cracks
- Ensuring fasteners are secure
A visual and physical inspection can reveal many issues.
Maintenance Practices for Longevity
Proper maintenance extends the life of the shifter assembly.
Recommended practices include:
- Periodic lubrication
- Replacing worn bushings
- Tightening loose components
Preventive maintenance improves shifting quality.
Lubrication Requirements
Lubrication reduces friction between moving parts and prevents premature wear.
Proper lubrication:
- Improves smoothness
- Reduces noise
- Protects metal surfaces
Using appropriate lubricants is essential.
Replacement of Worn Bushings
Bushing replacement is one of the most effective ways to restore shift feel.
Benefits of new bushings include:
- Reduced play
- Improved precision
- Enhanced driving experience
This is a common maintenance task.
Adjustment of the Shifter Assembly
Proper adjustment ensures correct alignment between the lever and transmission.
Adjustment improves:
- Gear engagement accuracy
- Shift smoothness
- Driver confidence
Misadjustment can cause gear selection issues.
Removal of the Lever Shifter Assembly
Removing the shifter assembly typically involves accessing it from inside the cabin and underneath the vehicle.
Careful removal prevents:
- Damage to components
- Loss of small hardware
- Misalignment during reinstallation
Attention to detail is critical.
Reinstallation and Alignment
Correct reinstallation ensures proper function.
Key steps include:
- Aligning linkage rods
- Securing all fasteners
- Verifying gear engagement
Improper installation can worsen shifting issues.
Aftermarket vs Stock Shifter Assemblies
Some owners choose aftermarket components to improve shift performance.
Differences include:
- Shorter shift throws
- Firmer feel
- Increased precision
However, stock assemblies prioritize comfort and longevity.
Impact of Driving Style on Shifter Wear
Driving habits significantly affect shifter assembly lifespan.
Aggressive shifting can:
- Accelerate bushing wear
- Stress linkage components
- Increase maintenance needs
Smooth shifting extends component life.
Cold Weather Effects on the Shifter Assembly
Cold temperatures can stiffen lubricants and bushings.
Cold weather effects include:
- Increased shift resistance
- Delayed smoothness
- Temporary stiffness
Proper lubrication helps mitigate this.
Noise and Vibration Issues
Noise or vibration during shifting often indicates worn or loose components.
Common sources include:
- Worn bushings
- Loose mounting points
- Dry pivot joints
Addressing noise early prevents further damage.
Safety Considerations
A faulty shifter assembly can pose safety risks.
Potential risks include:
- Inability to select gears
- Unexpected gear disengagement
- Loss of vehicle control
Prompt repair is essential for safe driving.
Cost Factors Associated with Shifter Repairs
Repair costs vary depending on the components involved.
Factors affecting cost include:
- Extent of wear
- Replacement parts required
- Labor complexity
Preventive maintenance reduces expenses.
Restoration of Original Shift Feel
Many owners aim to restore the factory shift feel of the 1999 Impreza.
Restoration typically involves:
- Replacing worn components
- Proper lubrication
- Correct alignment
This returns the vehicle to its intended driving experience.
Long-Term Reliability of the Shifter Assembly
With proper care, the original shifter assembly can last many years.
Long-term reliability depends on:
- Maintenance habits
- Driving conditions
- Component quality
Durability is a key strength of the design.
Compatibility with Other Impreza Models
Some components may be shared with other Impreza years, but differences exist.
Compatibility considerations include:
- Design variations
- Mounting differences
- Linkage length
Correct parts selection is important.
Benefits of a Well-Maintained Shifter Assembly
A properly maintained assembly offers numerous advantages.
Benefits include:
- Smooth gear changes
- Improved control
- Enhanced driving enjoyment
Maintenance directly improves performance.
Driving Experience and Driver Confidence
A responsive shifter enhances driver confidence, especially in manual transmissions.
Confidence improves:
- Driving precision
- Enjoyment
- Overall vehicle control
The shifter is central to this experience.
Mechanical Simplicity of the 1999 Impreza Design
The 1999 Impreza lever shifter assembly reflects a mechanically simple yet effective design.
Simplicity offers:
- Easier maintenance
- Fewer failure points
- Long-term durability
This is one reason for its popularity.
Final Thoughts on the 1999 Impreza Lever Shifter Assembly
The 1999 Impreza lever shifter assembly is a vital mechanical system that directly influences driving quality, control, and safety. Although it may not receive as much attention as the engine or transmission, its condition has a major impact on the overall driving experience.
Understanding its components, operation, common issues, and maintenance requirements allows owners to keep their vehicle performing at its best. With regular inspection, proper lubrication, and timely replacement of worn parts, the shifter assembly can continue to deliver smooth, precise, and reliable gear changes for many years.

How to Replace Transmission Seal on A1078 Corvette

How to Replace Windshield Washer Nozzle for 2013 Jeep Patriot

How to Set Honuras Time Zone on a WR20BAR G-Shock
Can You Rent a Storage Unit for a Month?
Voiply vs Axvoice: A Detailed Comparison of Two Popular VoIP Phone Services
How to Sign Up on ETSGamevent
-
 Gaming2 weeks ago
How to Sign Up on ETSGamevent
-
 Technology2 weeks ago
How to Use CPT Upgrade in gem5: Complete Step-by-Step Guide
-
 Home Improvement2 weeks ago
How to Switch Out HZ311 Thermostat for Ecobee Premium Thermostat
-
 Technology2 weeks ago
How to Tell a Bad Plate on Flex Printing
-
 Technology2 weeks ago
How to Update AMD Software Adrenalin Edition G14
-
 Technology15 hours ago
How to Set Honuras Time Zone on a WR20BAR G-Shock
-
 Automotive1 hour ago
How to Replace Windshield Washer Nozzle for 2013 Jeep Patriot
-
 Automotive52 minutes ago
How to Replace Transmission Seal on A1078 Corvette